Showing posts with label A Knight's Tale. Show all posts

Monday, 26 October 2020

DreadTober: Free-hand Shenanigans


Hi folks,

We are now into the final week of Dreadtober! October has gone by crazy quickly and I am a fair few steps behind where I would have liked to be at this stage with my Imperial Knight. It doesn't bother me though, painting a Knight in 4 weeks was always going to be an ambitious goal. 

To move me a little closer, I spent a couple of hours on Sunday completing the free-hand images on the shoulder armour. This step is always the one that makes me a little nervous, but I know that once it is done everything else is comparatively easy, so I tackled it early to get my mojo flowing. I won't include too much commentary and just let the pictures do the talking. It is another one of those processes where it looks really bad for a long time! Hopefully this will inspire some other people to push through the early agony to reach the rewards at the end. Here we go...


Here is the reference image I used while I was painting; it is a shower curtain 😂


I compressed the main a little to fit the space and didn't quite nail the angle, but that just helps make it my own. 

I also managed to get some construction done, so (at the moment) "Achilles" Aeternum is looking something like this:


Now, it is definitely time for sleep. Hopefully, if I get all of my work done tomorrow, I'll be able to push the project forward a little further by finishing the legs and sketching out the base.

See you across the table,

Marc


Sunday, 6 October 2019

DreadTober: Getting Started (Kinda...)


Hi folks,

Last year for DreadTober I set myself a challenging goal of completing an Imperial Knight Errant during the month of October. As it turned out, it took me the greater part for the month just constructing the thing! After a week of furious painting, I got up to this stage, which I was fairly pleased with:


Last year's efforts


I repainted the lining on the shield to make it a little straighter


 That leaves me with the chest plate, legs and arms still to paint, as well as a scenic base. As with the first of my knights, I am going to feature some simple freehand designs on both of the shoulder pads, which is sure to take up some extra time.


A previously finished Knight; this is what I am aiming for!


Of course, the first step is to prime and undercoat. To do that I use black spray to prime, followed by a Leadbelchers spray, taping off the areas that I want to keep black (or turn white!).


The priming stick


Lead has been belched


Next stage will be layering on the chest plate and lots of washes on the leg pieces (with some blue armoured sections).

That's it for my first week of progress; not much but it's a start!

See you across the table,

Marc


Friday, 19 January 2018

A Knight's Tale: Perseus Intrepidus TO-DONE!


Hi folks,

Today I added the finishing touches to the Imperial Knight Warden Perseus Intrepidus. For those of you who would like to know, the final touch was a minute wash of sepia around the left rivet about the eyes, which had somehow stoically avoided being washed all this time! I also repainted the plasma-blaster, which had been bugging me a bit.
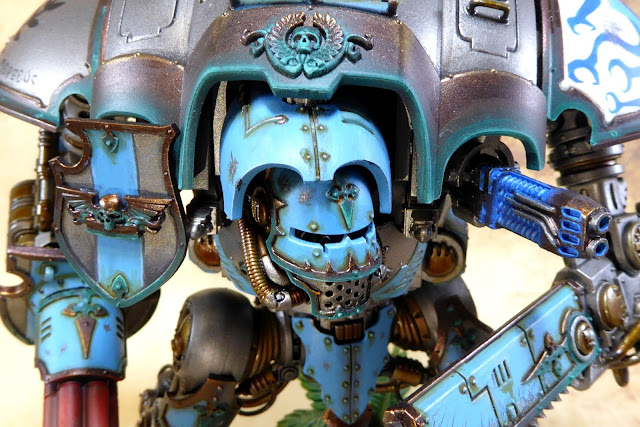


Sooo many rivets...


There isn't too much more I can say about the painting of this model, that hasn't already been said in other posts. It is by far my greatest accomplishment in this hobby, and I have been at this game for a while now. Still, Perseus wouldn't exist, at least not in this guise, but for a very specific set of circumstances and folks in the 40K community. Some of you may know part of the story, but probably not all of it. If you are not into stories, feel free to skip and just look at the pictures; I hope you enjoy them as much as I did taking them!


I added more weathering to the Reaper Chainsword.


The Medusa has five snakes, one for each plasma weapon.


My first exposure to the 40K universe was playing Epic 40K with a friend in 6th grade. I say the word friend loosely; I was really just a person for him to win games against, using the models his stepfather bought for him. I learned later that the army lists he wrote for me were always less points than his, sometimes by 50%. I distinctly remember using an Imperial Knight Castellan that punched way above its weight in our games. I resolved to get myself one, if I could ever afford it.


The Hellfire Plasma Cannonade.


I painted the inside of the exhaust, which was looking decidedly sprue-grey in the last photographs.


When the Imperial Knights and Wardens were released by GW I realised the time had probably come, on an even larger scale than I ever thought possible. Of course the Crusader variant was the closest to the Castellan of my boyhood memories, so I gravitated towards it. I was going to get myself one for Christmas a few years ago, when my dog Gypsy started getting sick. The surgery she required wiped us out financially, but I gave up the chance of owning a Knight gladly if it meant keeping my little shadow.


The following year Dave Weston (thankyou thankyou thankyou) from Confessions of a 40K Addict ran a terrain building competition. The prize was, of course, an Imperial Knight Warden. I love participating in community events like these, so I thought I would give it a go and be a part of it all. I didn't really have any hopes of winning, but if I did, well...

My Dawn of War Thermoplasma Generator did win the competition, despite some incredible entries by other members of the community. I was so excited when I received the prize, but also pretty nervous. I felt very much responsible for doing a good job with it, in honour of the other contestants. I opened up to the community about the project and got some great ideas from people. Thanks especially go to +squareoaky stewart for his ideas about House Feardrakken, which gave me the inspiration for the paint scheme. Other inspiration came from my simple, obsessive, love of plasma weapons! One of my last acts was painting the snake on the base as a Bandy-bandy, as suggested by my mate over the ditch, +D Power.


So, there you have it. I threw everything but the kitchen sink at this Knight, every painting technique I know and idea I could think of. Some... didn't turn out so well, but I'm glad I gave them a go. Thanks to everyone who spurred me on and provided critical feedback during the process, it was greatly appreciated. Thanks again to +Dave Weston  for gifting me this incredible model; it was an epic journey and looking at it now on the shelf brings it all back again. Hopefully, it will take some heads on the table top as well, perhaps whilst defending a Thermoplasma Generator ;-)


See you across the table,

Marc


Thursday, 18 January 2018

A Knight's Tale: Avenger Gatling Cannon and Reaper Chainsword


Hi folks,

So, technically, I have finished painting my Imperial Knight Warden. Excuse me while I dance around like an idiot for a minute. About 10 minutes ago I finished drybrushing the overheating Avenger Gatling cannon, finally using that contrasting red that I have been saving. Before having a go at it, I watched a whole heap of YouTube clips of miniguns firing at night and at various stages of overheating. You may not know it, but there has been some conjecture about the best way to paint heat effects on weapons as such as these, with most painters putting the hottest parts in the wrong place. This article on Tibbs Forge is an excellent source in that regard.  I focused primarily on the following photograph when painting the effect:


You can see that the coolest metal is towards the end of the barrels and the hottest part towards the heat source. I tried to reflect this in my paint job, with the added complication of the varying thicknesses of the barrel housing in the Avenger model. So, the closer to the actual barrel (deeper), the hotter I painted it. There is one section that I assumed would be naked barrel, which I painted the brightest of all.


I also noticed in all of the pictures and YouTube clips that the red glow was a touch pastel in appearance. I added a touch of purple into my reds to try and match this. I also used a mixture of purple and red brown on the coolest ends of the overheating barrels, with I highlighted by brushing actual Leadblechers.


In comparison, the Reaper Chaisword was far simpler to paint. I added some extra weathering and scratches into the sword blade, which I assume would take an awful battering in combat situations.


Tomorrow I will be adding a very small amount of weathering to the decals on the legs, adding some static grass to the base and painting a Bandy-bandy snake ;-)

...then I am doing the final assembly and calling him To-Done!

See you across the table,

Marc


Sunday, 14 January 2018

A Knight's Tale: Shoulders and Plasma Cannonade


Hi folks,

With a break in the weather I have been able to make some more progress, focusing mainly on the shoulder armour and Hellfire Plasma Cannonade. To help with the Medusa symbol on the right shoulder I made two simple stencils, one of the face and one of the mouth of the snake. I started by making a detailed sketch of the silhouette, then transferring the image to some tracing paper. I could then cut out the shape of the face to use as a stencil. Originally I wanted the face to be white (negative space), so to transfer the image to the shoulder I stipled Spacewolf Grey around the edges. I then used very watered down paint to mark out where the snakes would be. I needed the paint to flow very freely and not add a significant amount of texture, in case I needed to start again or paint over it.


When I was happy with the composition I started blocking in the snakes with solid colour.


To make the snake appearance consistent, I made a small stencil for the head, which I used four times. The head down the bottom was free-hand, as it needed to be smaller to fit in the space. I quite liked the design with the face being white, but it was clear when I put it on the Knight that the colour combination wasn't going to work.


I blocked it in using the same light blue as the rest of the scheme, and that seemed to appease the paint-Gods (there is also something just a little bit Daft Punk about it...). A touch of weathering finished it off.


I haven't decided whether or not the other shoulder is finished yet. I think I need to sleep on it. I was tossing up whether to paint the forward section light blue and use a white decal in that spot, but this would compete visually with the Medusa symbol. I settled on a skull and laurel design that I added using free-hand, but it left the section closest to the front awfully empty. I filled it with the Knights name... in Greek. It may or may not stay that way; let me know what you think.


The Hellfire Plasma Cannonade took me a day to paint by itself, on and off. I originally had all of the plasma weapons painted with a green glow but, again, when mounted they just didn't fit the scheme very well. There is not much contrast in the blue that I have used but it matches the plasma weapons of my Iron Snakes and mirrors the colour of the snakes on the shoulder armour: 5 snakes for 5 plasma barrels :-)


Next I will be working on the Reaper Chainsword and Avenger Gatling cannon. The plan is to paint the chainsword quite plainly, but the cannon is going to have overheating barrels. I have been saving my reds and oranges for one special dose of contrast; I am interested to see if I can make it work. So many times during this project I have tried something different and then had to carefully reconsider in light of the entire body of the project. The Avenger is going to be the final hurdle in that regard, I predict. Just call me Nostradamus ;-)


See you across the table,

Marc


Friday, 29 December 2017

A Knight's Tale: Body Complete


Hi folks,

Just a quick update to show the work I have just completed on the body of my Knight. The first plasma weapon is complete and installed; after a bit of deliberation I decided to go with a green glow. I had the option of using a more contrasting colour but I am saving that for something special later on.


The carapace armour itself is mostly Leadbelchers, with a blue stripe running from back to front. I added this to hint at a helmet plume and to continue the colour scheme used on the rest of the body. The bronze parts also got a fair whack of verdigris. 


I am considering now whether the shield and the blue stripe on the back could do with a white decal, to match the colour combinations on the legs. I think it will come down to whether or not I can find a decal that really works in each of those locations. A single white sword going down through the winged skull of the shield and emerging out the bottom could look good.

Apart from that, the next step is the quad Hellfire plasma cannonade to go on the top. I will be taking a lot of care with it, as I imagine it is going to draw a lot of attention.

See you across the table,

Marc


Friday, 22 December 2017

A Knight's Tale: Medusa Shield


Hi folks,

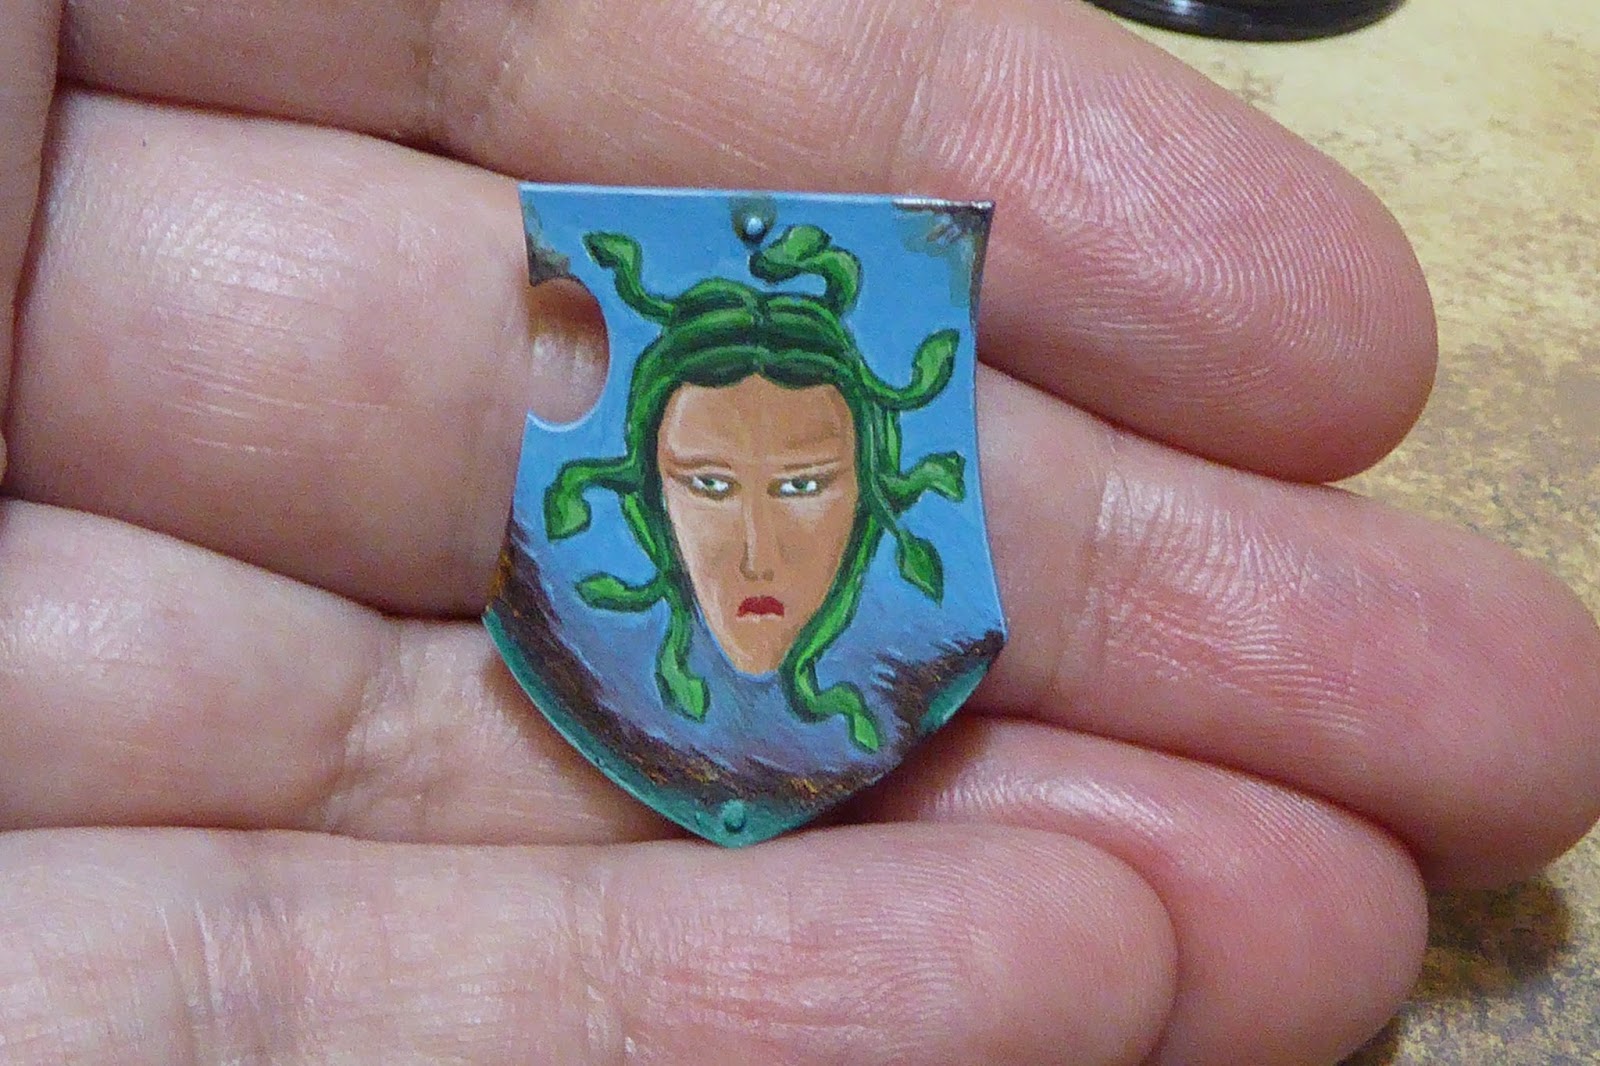
I have dabbled a little bit in free-hand art on my 40K projects; mainly symbols and emblems, but it is hardly something I would describe as my forte. The challenge for this morning was to paint a Medusa on my Imperial Knight's Ion Shield. I wanted her to look attractive, but also... venomous. To get into the groove I did a quick sketch and had a go at painting the basic shape to scale. This helped me to practice the shading and brushstrokes that would be required.


After getting the rough shape of the head done, I added the darkest detail of the face, as I have found that this is the easiest way to figure out where to put the lighter shades.


After that I added the whites of the eyes and outlined the snakes.


After blocking in and shading the snakes I added the blue background and got the sense that it just wouldn't work with the rest of the Knight. By itself it was fun but compared to the rest of the piece it is lacking in contrast, distracting with the flesh tones and missing some vita elements.


To give it the best chance possible I added some extra weathering and highlights, deepening some of the deepest shadows and adding more contrast to the face. On the Knight it looks fine, but I have not decided if I am going to keep it yet. I'm going to sleep on it and get some feedback from the 40K community before I decide what to do. The process was great fun, though, and I will keep pushing myself this way I think, so that some day I will feel more comfortable with free-hand designs.


See you across the table,

Marc